home aboutus etsyshop contact Image Map
Showing posts with label sewing. Show all posts

Friday, July 18, 2014

Toddler Maxi Dress

I am always looking for sewing projects that involve something other than the stuff I'm typically sewing (ie baby accessories for the shop).  My favorite little person to sew for right now is my Jessalyn.  So, when I stumbled across a super cute maxi dress from Heidi & Finn, I couldn't resist!

I've blogged about my experience with Heidi & Finn patterns before...remember the sweet Red Poppy Dress I made this spring?  Well.  Just to remind you - I love their patterns.  They are affordable, adorable and super easy to follow.  In one afternoon and I had this cute little number:

(you can find her headband HERE)

I was a little worried about the length of the dress; I went back and forth trying to decide if I should shorten it up or leave it long.  I didn't want her tripping over it all the time.  I was just too in love with the idea of this sweet boho outfit that I couldn't bring myself to shorten it. Luckily, Jessa has had no problem with the longer length.  She managed a full day running around the aquarium without one trip or tumble.


It is the perfect summer dress for super hot Arizona summers (And autumn.  And spring.).  I think we'll be getting a great deal of use out of this adorable dress!

Have you tried Heidi & Finn patterns yet?  If not - go for it!  Oh.  And by the way?  This is in no way sponsored by Heidi & Finn.  I just really love their stuff.  A lot.  Happy sewing!!

Wednesday, July 9, 2014

Toddler's Reversible Headband

Last Thursday, it fully dawned on me that the next day was the 4th.  I also realized that I hadn't planned any festive clothing for them.  Luckily, everybody had *something* suitable to wear for the holiday.  However, my little miss needed a little something extra.

So...she and I quickly made a couple of 4th of July headbands.

Even though she refused to take a decent photo,
and even though you can see my icky closet in all it's messy glory,
you can also see a perfect shot of her headband.
(By the way?  Fully reversible.  
It has red and teal flowers against a white background on the other side.)


I modified a tutorial I found on the Riley Blake blog, which you can find HERE.

Since then, I've kind of become obsessed with headbands.
If you need a reversible headband for anything, you know where to come!
My Jessa and I have got you covered!
Perhaps we'll put a few in the shop in a few weeks.


Tuesday, July 1, 2014

2nd Annual "Design Your Own Canopy" Contest!!


Towards the end of summer, I start looking for fresh and new ideas for car seat canopies in the shop.

Last year, we had an amazing time with our first car seat canopy design contest, 
so we're doing it again this year!

This is the combo that won last year.


Cute, huh?

Now it's your turn!

Simply visit an online fabric store and come back to leave a comment with the links to your favorite fabric swatches.  The reader that picks out a combo that I absolutely love the most will win a car seat canopy in those fabrics. **Keep in mind that you need at least two different (yet coordinating) fabrics for your canopy.**

So.  A few details.

1.  Fabrics can be picked from ANY online source.  A few suggestions?  Fabric.comFabricworm, Raspeberry Creek Fabrics, or Fashionable Fabrics.  Again, these are just suggestions.  As long as I can follow a link back to your fabric choices, they can really come from anywhere!

2.  It's best to keep to cotton, corduroy, flannel and/or minky.

3.  You have 2 weeks to pick fabrics and share!  I will announce a winner on July 15.

4.  And, so sorry, but this little contest is only open to readers in the US.

Any questions?  Leave them below and I'll respond to you asap.  I cannot wait to see what you all come up with!  

Good luck and have fun!!

Monday, March 3, 2014

Red Poppy Dress

When my husband goes out of town, I end up staying up WAY too late working on a variety of different sewing projects.  After all, what's a girl to do when the kids go to bed by 8:00?

The last time he went out of town, I made a very last minute decision to make a dress for my little girl.  So last minute, in fact, that I drug all 3 of my children to the fabric store with me to pick out the fabric.  Luckily, I found the perfect fabric within just a few minutes of walking into the store.

Have you all heard of Heidi & Finn?  I'm sure you have.  They're all over Pinterest and their Etsy shop is always hoppin'.  This is my first time sewing with one of their patterns and I will definitely be going back for more.  I started with their Colorblock Dress, and I absolutely love it.

The entire dress probably took me a grand total of 2 hours from start to finish.  That plus $10 worth of fabric? Totally worth it.


Seeing as I finished the dress long after my little gal went to sleep, I had to wait patiently for her to try it on.

And then I forgot to take a picture until after church, when she is overly tired, cranky, has graham crackers smeared all over her face and dress and is looking a bit rough.

That's okay.  She's still cute.  And I still love the dress.


The hubbs is going out of town again next month.
I think the Heidi & Finn Summer Maxi Dress will be the sewing project of choice.  I'll let you know how it goes.  In the meantime, are there any other amazing pattern shops I need to be aware of??


**By the way.  I received nothing from Heidi & Finn for writing this post.  I bought the pattern on my own; I just really loved their pattern and shop and wanted to share.**


Saturday, January 18, 2014

Homemade PJs

Have you entered to win the "Home Sweet Home" giveaway by Little Dorn Designs?
You can do so HERE
-----------------------------------------------------------------------------

This year for Christmas, I made everybody new pajama pants rather than buying new jammies.  And let me tell you.  After whipping all of these out (with no pattern) so quickly, I doubt I will every buy pajama pants again.  They cost me less than $3.00 and an hour to make.

Using a combination of tutorials found here and here (thank you Pinterest!), I simply used pants my children currentlywear to make a "pattern".  And really it wasn't even a pattern; I just laid the old pants on top of my fabric and cut around them, making sure to leave extra room for PJ-comfyness and growing room. Probably not the most ideal method, but it worked.


For my daughter, I added a $5.00 t-shirt from Target to complete her pajamas.

I even made a pair for my sister.

Now.  Do you think any of my children would stand still in their new jammies for a photo?
Not a chance.
Not individually.
Not together.
So...just imagine 3 little ones (and a slightly larger auntie) all wearing their pjs.
I'm also happy to say that not only have all the jammies been worn several times since Christmas, they have even held up being washed that many times without falling apart.  Success!! ;)

What homemade gifts did you give for the holiday season?  Do you have any in mind for Valentine's Day?    


Tuesday, July 30, 2013

Felt Garland: A New Obsession

I've seen a few different felt garlands around Pinterest and Etsy, and decided that I wanted to make one for my daughter's upcoming 1st birthday.  I debated whether or not to cut the felt shapes out myself, but when I found an adorable little Etsy shop that had a ton of different shapes in an amazing variety of colors for super, duper cheap; I decided that route would be much easier.  And then, I decided that I needed not one but three different types of garland.  And to be perfectly honest, I will probably decide I need even more.

(Btw, the Etsy shop?  {Paper4u}. I got 3 different themed packages of felt shapes for less than $20.  Yes, they are in Latvia, but I still got my order in less than 3 weeks.  I highly recommend them should you want to make felt garland the super easy way!)

The first garland I put together was in brightly colored, whimsical hearts.
This one I plan on using for my daughter's birthday.  I also plan on using it for Valentine's Day decor.
  All you do is decide which order you want your shapes in and then sew them together!  I just sewed super slow and fed each individual shape as my machine was still running, which gave me the spacing I wanted between each heart.

This was super fun for my kids to help with as well; they enjoyed picking out which color to put on next (great practice for learning patterns!).

And fyi?  The foam boards I used to to store fabric (you can read about that here) are also perfect for storing garland.
 A total of $5.00 and 10 minutes later, I have a garland of hearts that I love.  Not too shabby!

After the hearts came plain circles for Halloween.
And as soon as I get caught up with my other projects, I'll also have a garland using these cute leaves for autumn/Thanksgiving.

So.   What occasion are you going to use as an excuse to make some super cute garland?

Wednesday, July 17, 2013

Tooth Fairy Pillow

Last night, my 5 year old discovered his first loose tooth. I am already struggling with the fact that he's getting ready to start Kindergarten in 3 weeks; I didn't need his first loose tooth on top of it!!  Anyway.  He was quite worried and obsessed about it last night; worried if it would hurt, worried if he could still eat, wondering if the Tooth Fairy was really real or just a story, and on and on and on.  Then at 5:30 this morning, it was the same conversation all over again.  I was trying to get out the door to work and left him with "Honey, you don't need to worry about it yet.  It will take a long time for your tooth to fall out.  It's okay".

Literally 10 minutes after I got to work this morning, my husband texted me telling me that Brychan's tooth had fallen out.  WHAT?!?! 

#1: I just found out last night it was loose!
#2: I missed it?!?
#3: My husband was still in bed when it happened, which means my son was all by himself when it happened.

So, I made a quick call to my son to get all the details, finished with work and hurried home.  As soon as we got home, we decided to make a tooth fairy pillow for him.

This is what we ended up with.
(Please excuse my cell phone photos!)
Here's how we did it!

First of all, I let him pick out his fabric from my ridiculous stash of extra fabric.  I then Googled a tooth pattern to print off and cut out.  I looked at so many different "teeth", but I think I ended up getting one from the Singer website.  Anyway.  I printed the picture, cut it out of white flannel and let my son decorate it the way he wanted (I just let him use permanent markers).  Obviously, there had to be blood; because that's what his real tooth looked like.  And then it needed a sweet smile.
Brychan then helped me sew the pillow together.  He chose some light blue minky and I cut 2 9" squares from it.  I sewed the tooth on the right side of one of my squares first; using a zig-zag stitch all the way around.  I left a little opening at the top for a pocket.

I then put the two right sides of the pillow fabric together and sewed all around the edges, leaving a small hole to a) turn it right side out and b) fill it with stuffing.

I then let him put all the stuffing in his pillow before I hand sewed the little opening up.
And there's my super happy boy with his new tooth fairy pillow!
When I first found out that Brychan had lost his tooth already, I was so sad that I didn't get a chance to order him a cute little tooth fairy pillow.  But now; I am so grateful that I didn't get that chance!  We had so much fun making his pillow together, he's proud of the fact that he made it, and he LOVES it.  He's been carrying it around with him all day.

Now if somebody could please just figure out how to make time stand still for a little while...

Wednesday, July 3, 2013

Rice Heating Pad

I'm sure all of you are already familiar with a rice heating pad.  In the small chance that you're not: they are wonderful.  Just a bag filled with rice that you stick in the microwave for a few seconds  and then just plop it on whatever part of your body that's needing some pressure and warmth.  I LOVE them and have always wanted one, but never took the time to make one.

Without going into too much detail...this weekend I had a horrible gallbladder attack. If you've never experienced one; I hope you never do. It's not something I would wish on my worst enemy. This particular attack lasted 3 days. For those of you who do know what I'm talking about; THREE DAYS!!! I was in agony and all I wanted was a rice heating pad to help alleviate the pain. But did I have one? Of course not! So, now that I am back among the living, I hurried and made one this afternoon.

Good news.  This is a great project for using up your scraps.  Even better news?  Seriously took me 15 minutes to do.  Tops.

Okay.  So all you need to do is figure out what size you want.  It can be as big or small as you want.  I had a roommate in college that had a long skinny one (kinda like a long, fat snake).  I knew I wanted mine to be just the right size to lay on my upper tummy area should I have another gallbladder attack before I get this sucker taken out of me.  My perfect size was about 9"x5".

Cut two pieces of fabric that are (obviously) the same size.

With same sides together, sew all around the outside edges, leaving a hole just large enough to a) turn your bag back right side out and b) pour all of your rice in.  If you feel so inclined, go ahead and trim the extra fabric before flipping it back right side out.
Then, pour in your rice!  It just so happens that a 2 lb bag (minus the cup I used with dinner tonight) was the perfect amount for my heating pad.  Be careful that you don't overfill it; you want there to be some "wiggle room" in there for the rice.
When you're done, shove all the rice to one end and quickly and carefully sew up your little hole.  You can do it by hand if you want it to be prettier.  I didn't really care and just wanted it done, so I used my machine.  If you look really close at the photo below, you can see it.
Then, viola!  You have a great little heating pad ready and waiting for you to need it.  I made mine with flannel; I wanted that extra cozy factor added to it.  As you can see it's already a big hit!


Thursday, May 23, 2013

Car Seat Organizers

We have a last minute, unplanned and unexpected trip to Utah coming up soon.  And because my car has little to no extra storage space when it comes to traveling, I wanted to throw together some car seat organizers for my boys to keep some of their "treasures" in.

So...I perused Pinterest for a few minutes to get a few different ideas, gathered some scrap fabric I had laying around (I happened to use a bunch of Peak Hour fabrics from Riley Blake), took a few measurements and got busy!

These were SO simple that a tutorial really isn't even necessary.  You can totally figure out how to make these just by looking at the photos.  After measuring my car seats, I found that I needed my fabric to be cut 16" x 19" for the main bag.  Basically, you take your 2 pieces of fabric, sew them right sides together and then flip them right side out and add your handles.


I added a pocket on the front of the organizer just because I had plenty of fabric.  The strap was 3" x 18" (I wanted it to be pretty flush with the car seat).

Making both organizers took about an hour.  Super fast.  Super easy.  Super cheap.
And I'm hoping that they are similar enough that there will be no fighting over who gets which one.
I can't wait to stock their little organizers full of their surprises for the trip (I think I'll do another post just with ideas for road trips with littles...), and hopefully these organizers take some of the chaos out of the back seat!!


Sunday, April 14, 2013

Maxi Gone Wrong!

I've been wanting to make a maxi skirt for awhile, now.  
I even found this fabric that I'm dying to use at Girl Charlee Fabrics.  
Since I've never actually sewn with knits before and the whole maxi skirt is also a new thing for me, I figured I'd better do a test run first.  
So, my sister and I made a quick run to Joanns for some cheap knit.

What I ended up with was somewhat of a hot mess.  In the end, it turned out okay.  Not great.  Nothing to brag about or anything of the sort.  It's okay to wear as long as nobody is looking closely (and maybe just in the comfort of my own home), but it didn't turn out anywhere near as good as I wanted it to.  


Good thing I opted for a test run!  :)  I learned several things this go around.

#1: Trust my gut!!  I had this whole pattern/plan in my head of what I wanted to do.  And, I had a maxi skirt in my closet that I was planning on using for my first pattern.  But then?  I chickened out.  Told myself I didn't know what I was doing, so I better look for a tutorial online.

Bad idea.

Now.  I'm sure the tutorial's I followed were great for other sewers, they just didn't work for me.  My skirt ended up being probably 3 times larger than I wanted it.  My waist band (that I got from one tutorial) fit me perfectly.  However, the skirt portion didn't touch me anywhere, and there was no way it was going to fit on the waistband without a LOT of gathering.  My waistline, although it is getting smaller, does not need any kind of extra gathering around it.

Obviously, I managed to work around it and fix the problems.  But. Had I gone with my initial plan and trusted myself, I could have saved myself quite a bit of time.  And fabric.  And picked out seams.

Which brings me to Lesson #2:  Ripping seams from knit jersey is NOT fun.  Enough said.

And Lesson #3?  Using a zig-zag stitch really does work wonders on knit as long as it is done properly.  My seams that were at the very edge of the two fabrics (Does that even make sense? So it looks more like a serged edge than sewn...) turned out perfectly.  Gorgeous.  However, using them just down the middle of the fabric didn't work so great.  I got lots of puckering. Yes.  I was sewing down the middle of my fabric at one point (refer back to Lesson 1) trying to fix the size without ripping my seams.  I should have just ripped my seams and started over.  Regardless.  That's why it's a lesson learned, right?


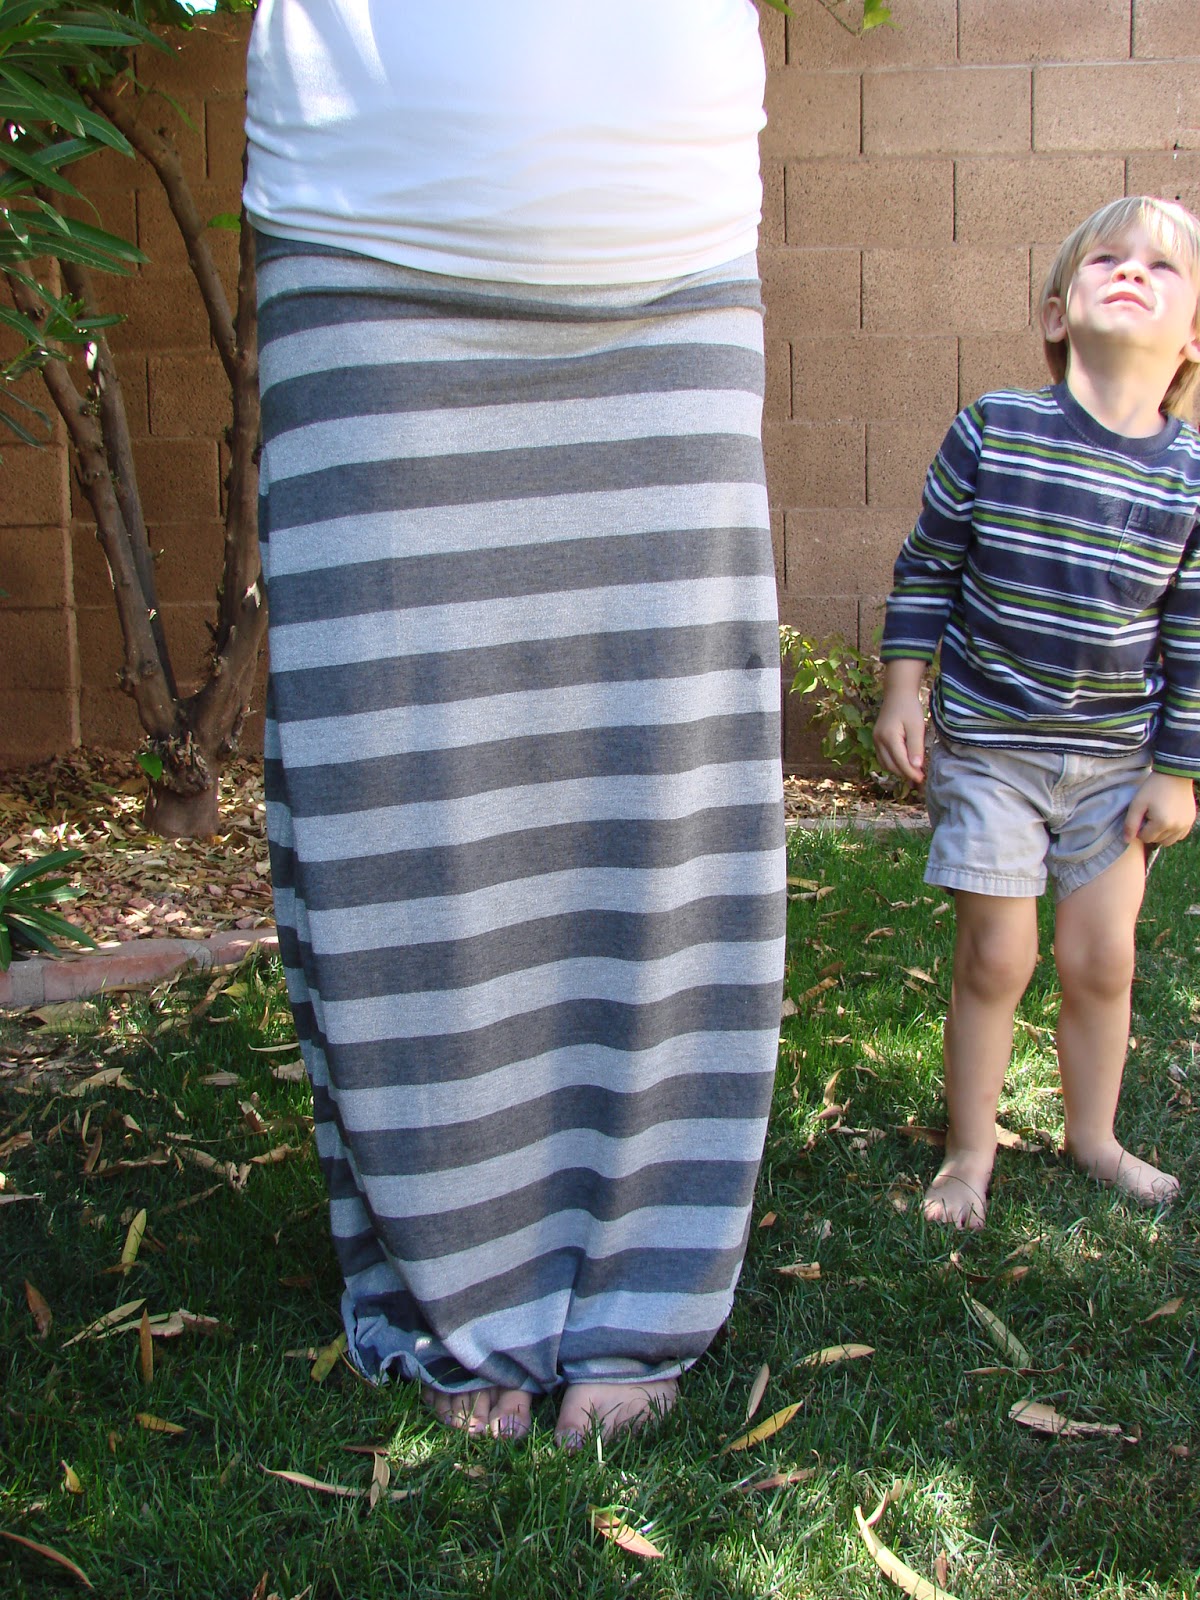
Bottom line is that I will be doing at least one more test run before I dive into the fabric I really want to use.  This skirt will work well enough for bubble blowing fun in the back yard this summer with the cute boy above.  And you can't really have too many maxis, can you?

Monday, March 18, 2013

Sun Suit for Little Miss

Lately, I have really wanted to work on expanding my sewing skills and experience. I can sew a straight line like nobody's business. But, as I've mentioned before, that's about where my expertise ends.  I happened to stumble upon a cute pattern from Little Lizard King and just decided to go for it!

And yesterday I whipped up this cute little thing for Little Miss:


I LOVE it!!  It only took a couple of hours, and was super easy.  I will be making at least one other one with ruffles on the bum, and I really want to adapt the pattern so that the halter tie criss-crosses on her back.

And, with an amazing deal I got on this Riley Blake fabric, this little outfit only cost me $3.00. Nice, right? But. The best part of this little sun suit?  I get to look at all of those adorable rolls of chub all.summer.long.  What could be better than that?

Ninth Street Notions

Wednesday, August 1, 2012

DIY Gauze Swaddle Blankets

Awhile ago, I found {this} tutorial on {MADE} for sewing your own gauze swaddle blankets.  I pinned it immediately, because

       a) good gauze swaddle blankets are typically pretty pricey
       b) they will be perfect for the AZ heat
       and
       c) I can make sure the blanket is big enough to actually swaddle Little Miss without it coming undone all the time.

Essentially, all you do is cut an even square out of your fabric, finish the edges (you can serge if you like) and then you're done.  Super simple.

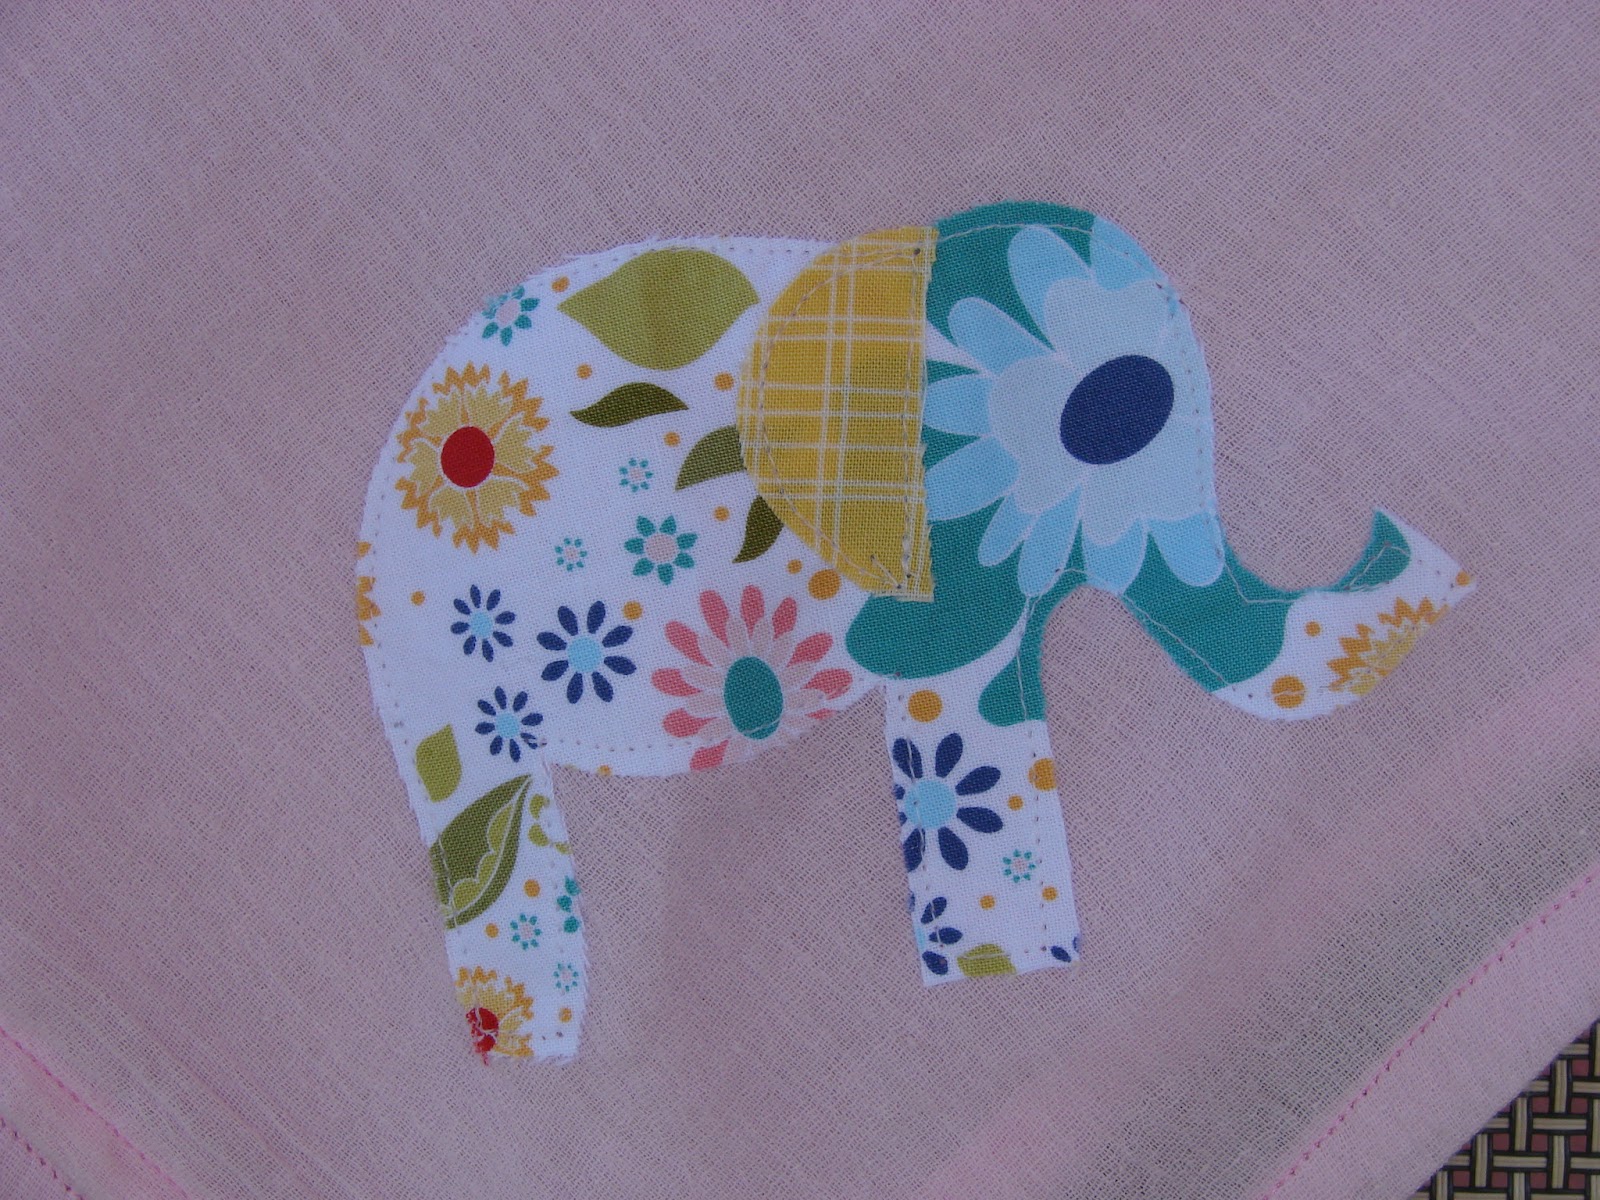
Here's what I came up with.  After following the tutorial mentioned above, I had a plain pink, 46"x46" square gauze blanket.  I wanted to dress it up just a tad, so I found a pattern for a little elephant that I could turn into an applique.

Using some scrap fabric I had laying around, and following the directions on the fusible webbing, I came up with this sweet little thing.


So, for less than $7.00, I have a blanket that I love and hopefully one that will keep my little one swaddled tight!


Sunday, July 8, 2012

Neck Coolers: A Tutorial

I am back!  For real this time...and hopefully for good until it's time for maternity "leave".  The past month has been a whirlwind of traveling, family and fun; but I am happy to be home and getting resettled into normal life!

So.  One of the many things I was busy with last month was Girl's Camp (for those of you who are not LDS, Girl's Camp is exactly what it sounds like; a camp for teenage girls ages 12-18).  Because we are in Arizona and it is H.O.T., I decided to make neck coolers to help keep our girls cool amidst the super high temps.

Here's how it went:

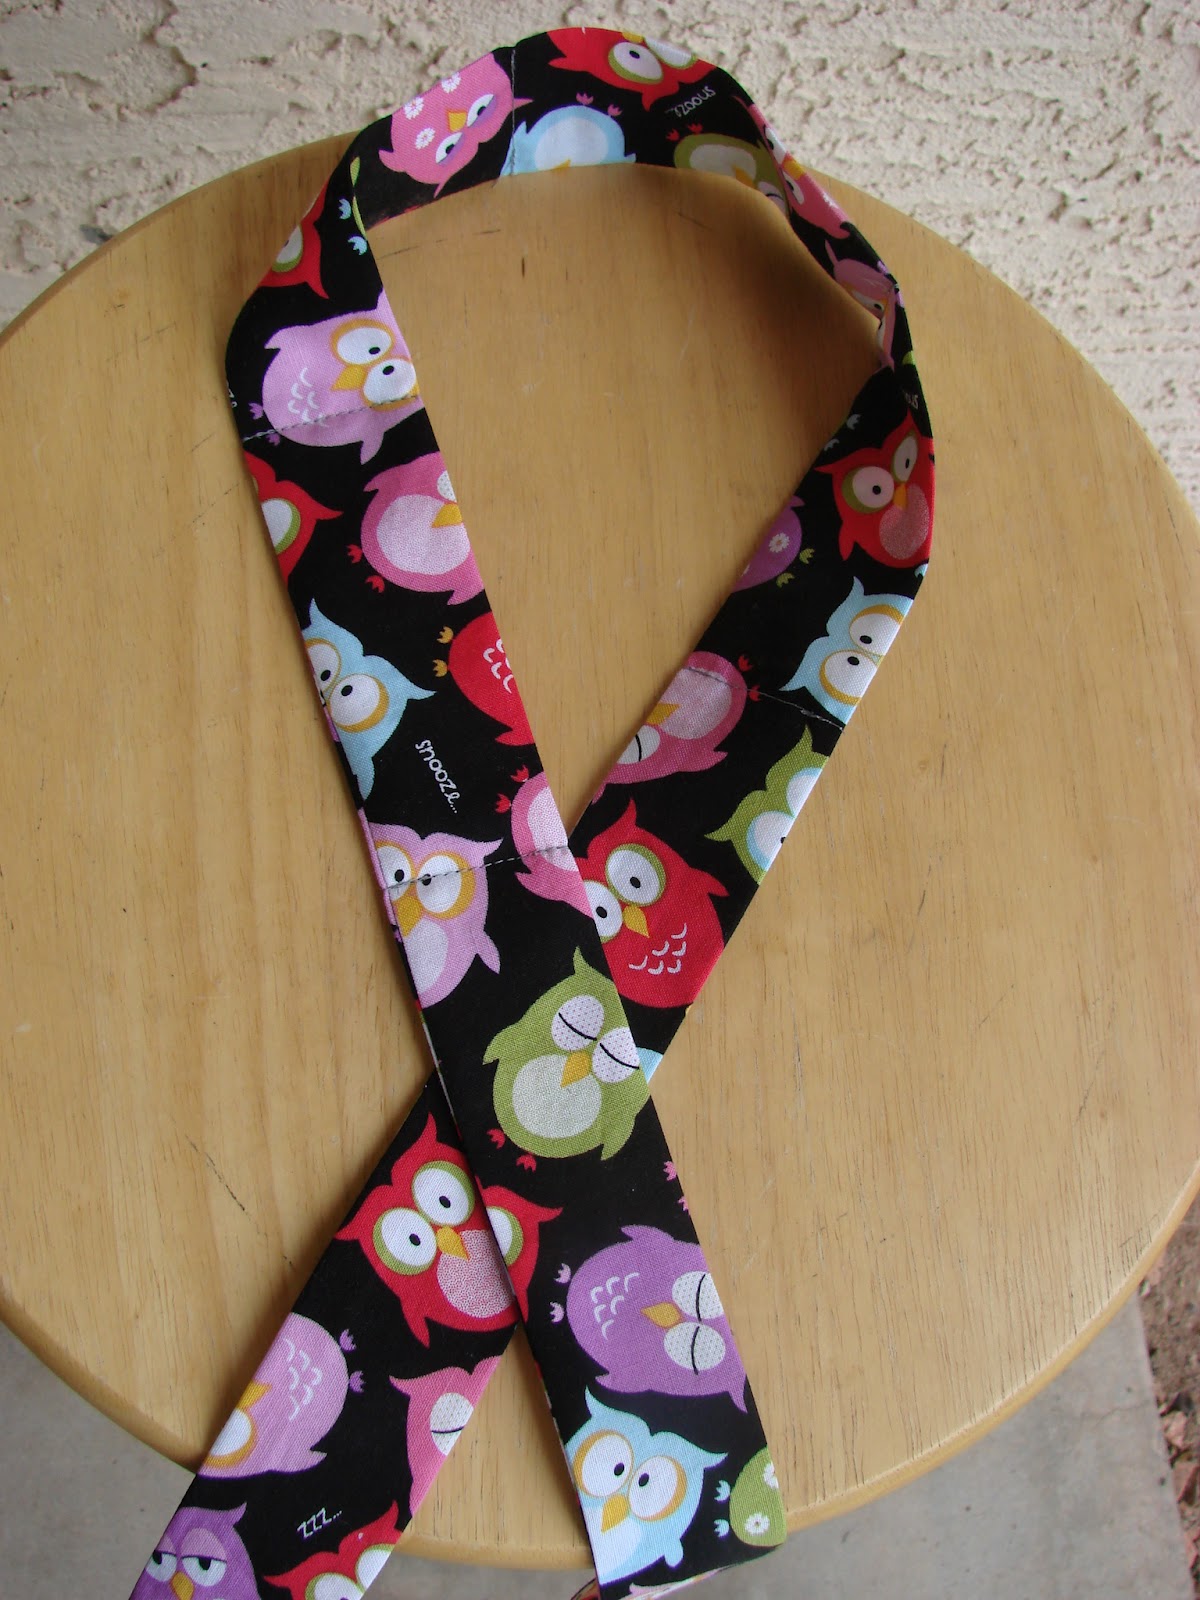
Pick any cotton fabric you want.  Because our theme this year was "Whoo's on the Lord's Side, Whoo?", I went with this super cute owl fabric that I ordered from {Stitchin Away}.  You will also need thread and polymer water crystals* (I will get to those later, but you can get them at any craft store or gardening store).

To start, you want to cut your fabric into a 4"x 36" strip.   You can make them longer than 36", but because I was making 32 of these bad boys, I needed to get as many out of a yard as I possibly could.  And actually, 36" worked perfectly for our teenagers!!


Fold your strip in half lengthwise (with right sides together) and iron it flat.  Sew the entire length of your long side using a 1/2" seam allowance, leaving you with a long, 36" tube of fabric that is open on both ends.

If you are only making a few and want your seam to be cleaner and lay better, trim the excess fabric off the seam allowance.  Again, since I was making 32, time was of the essence, and I skipped that step.  They turned out fine!


You will then turn your tube right side out and iron flat again, with your seam on one of the edges.
Here's where it gets kind of tricky, just because my fabric is dark and you can't see where I sewed.  Fold your tube in half to ind the center and sew a straight line across (so you basically have two large sections of your tube).
Open one end of your tube, and poor 1/4 to 1/2 a teaspoon of the polymer water crystals in.  *Be sure to finish one neck cooler completely and submerge in water to make sure you are putting the proper amount of crystals in.  In the first cooler I made, I only put 1/4 of a teaspoon in each pocket, but realized I could easily fit more, so I ended up using a heaping 1/2 t. for each pocket.*

Measure 4" up from your center seam, and sew another seam straight down, making a little 4" pocket to secure your crystals.  Does that make sense?  You will repeat this one more time on the same side that you started, and then repeat the process on the other end of your tube.  You should end up with 4, 4" pockets (each holding polymer crystals) in the center of your tube.

To finish them off, simply fold in the edges on your ends, and stitch straight across, securing them closed.

That's it!  They are super easy to make.  Just submerge them in cool water until they expand and enjoy!  They will stay cool and expanded for quite awhile before returning to their original state, and they can be used over and over again.

*These are polymer water crystals. 
It's the same stuff used in baby diapers, but it is also used for gardening.  You can buy them at any craft store and I'm assuming any gardening store.  I actually ordered mine from Amazon, and purchased a 1lb bag of it for less than $10.  I had a bit left over after making all 32 neck coolers.

LinkWithin

Related Posts Plugin for WordPress, Blogger...