home aboutus etsyshop contact Image Map
Showing posts with label projects. Show all posts

Wednesday, July 3, 2013

Rice Heating Pad

I'm sure all of you are already familiar with a rice heating pad.  In the small chance that you're not: they are wonderful.  Just a bag filled with rice that you stick in the microwave for a few seconds  and then just plop it on whatever part of your body that's needing some pressure and warmth.  I LOVE them and have always wanted one, but never took the time to make one.

Without going into too much detail...this weekend I had a horrible gallbladder attack. If you've never experienced one; I hope you never do. It's not something I would wish on my worst enemy. This particular attack lasted 3 days. For those of you who do know what I'm talking about; THREE DAYS!!! I was in agony and all I wanted was a rice heating pad to help alleviate the pain. But did I have one? Of course not! So, now that I am back among the living, I hurried and made one this afternoon.

Good news.  This is a great project for using up your scraps.  Even better news?  Seriously took me 15 minutes to do.  Tops.

Okay.  So all you need to do is figure out what size you want.  It can be as big or small as you want.  I had a roommate in college that had a long skinny one (kinda like a long, fat snake).  I knew I wanted mine to be just the right size to lay on my upper tummy area should I have another gallbladder attack before I get this sucker taken out of me.  My perfect size was about 9"x5".

Cut two pieces of fabric that are (obviously) the same size.

With same sides together, sew all around the outside edges, leaving a hole just large enough to a) turn your bag back right side out and b) pour all of your rice in.  If you feel so inclined, go ahead and trim the extra fabric before flipping it back right side out.
Then, pour in your rice!  It just so happens that a 2 lb bag (minus the cup I used with dinner tonight) was the perfect amount for my heating pad.  Be careful that you don't overfill it; you want there to be some "wiggle room" in there for the rice.
When you're done, shove all the rice to one end and quickly and carefully sew up your little hole.  You can do it by hand if you want it to be prettier.  I didn't really care and just wanted it done, so I used my machine.  If you look really close at the photo below, you can see it.
Then, viola!  You have a great little heating pad ready and waiting for you to need it.  I made mine with flannel; I wanted that extra cozy factor added to it.  As you can see it's already a big hit!


Sunday, April 14, 2013

Maxi Gone Wrong!

I've been wanting to make a maxi skirt for awhile, now.  
I even found this fabric that I'm dying to use at Girl Charlee Fabrics.  
Since I've never actually sewn with knits before and the whole maxi skirt is also a new thing for me, I figured I'd better do a test run first.  
So, my sister and I made a quick run to Joanns for some cheap knit.

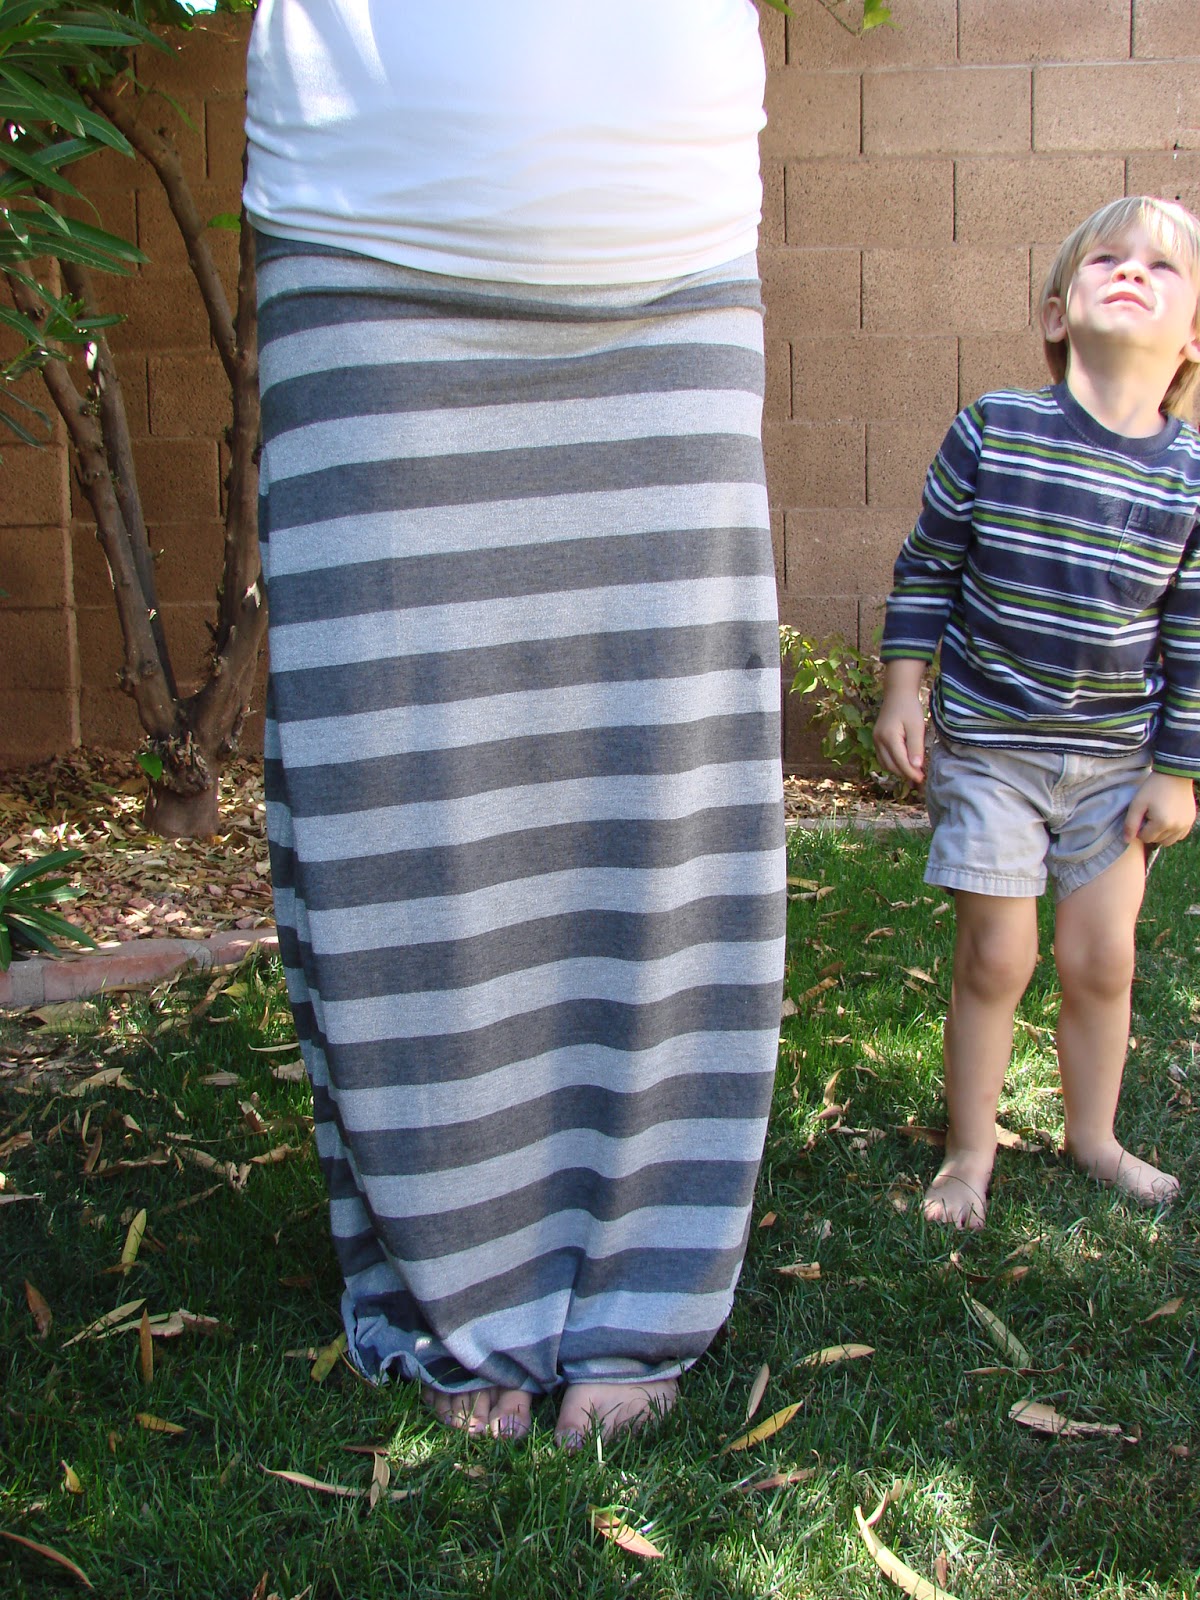
What I ended up with was somewhat of a hot mess.  In the end, it turned out okay.  Not great.  Nothing to brag about or anything of the sort.  It's okay to wear as long as nobody is looking closely (and maybe just in the comfort of my own home), but it didn't turn out anywhere near as good as I wanted it to.  


Good thing I opted for a test run!  :)  I learned several things this go around.

#1: Trust my gut!!  I had this whole pattern/plan in my head of what I wanted to do.  And, I had a maxi skirt in my closet that I was planning on using for my first pattern.  But then?  I chickened out.  Told myself I didn't know what I was doing, so I better look for a tutorial online.

Bad idea.

Now.  I'm sure the tutorial's I followed were great for other sewers, they just didn't work for me.  My skirt ended up being probably 3 times larger than I wanted it.  My waist band (that I got from one tutorial) fit me perfectly.  However, the skirt portion didn't touch me anywhere, and there was no way it was going to fit on the waistband without a LOT of gathering.  My waistline, although it is getting smaller, does not need any kind of extra gathering around it.

Obviously, I managed to work around it and fix the problems.  But. Had I gone with my initial plan and trusted myself, I could have saved myself quite a bit of time.  And fabric.  And picked out seams.

Which brings me to Lesson #2:  Ripping seams from knit jersey is NOT fun.  Enough said.

And Lesson #3?  Using a zig-zag stitch really does work wonders on knit as long as it is done properly.  My seams that were at the very edge of the two fabrics (Does that even make sense? So it looks more like a serged edge than sewn...) turned out perfectly.  Gorgeous.  However, using them just down the middle of the fabric didn't work so great.  I got lots of puckering. Yes.  I was sewing down the middle of my fabric at one point (refer back to Lesson 1) trying to fix the size without ripping my seams.  I should have just ripped my seams and started over.  Regardless.  That's why it's a lesson learned, right?


Bottom line is that I will be doing at least one more test run before I dive into the fabric I really want to use.  This skirt will work well enough for bubble blowing fun in the back yard this summer with the cute boy above.  And you can't really have too many maxis, can you?

Friday, September 14, 2012

Magnetic Memo Board

Wow!  Welcome to all of our new blogger friends!  I hope that now the big giveaway is over you'll stick around and play! :

Since we've been turning the office into a nursery, my boys kept asking me when I was going to "paint their room". Well. I wasn't going to paint their room (it really doesn't need it!), but I did decide to freshen it up a little bit. After all, it was still pretty babyish, and it didn't seem fair that baby sister was getting all the new stuff!

So, out went all the zoo animals and in came the dinosaurs! One thing I wanted to add to their room was a memo board to hang pictures on. Off  I went and bought 2 14x14" magnetic dry erase boards and 2 14x14" cork boards (just like the ones shown below via Amazon).  And, after perusing Fabric.com for quite awhile, I found some super cute dinosaur fabric that I not only loved, but matched the boys room as well. 

 For all of you non-sewers - there was no sewing whatsoever involved in this project AND it took me less than an hour. Here's what I did:

First, I cut my fabric.  Since my boards were 14" square, I cut my fabric 17" square so that I would have enough edging to wrap around the sides and to the back.
Then, using spray adhesive, I glued the fabric on to the boards. 
Had I had an ounce of patience and/or forethought, I would have marked my fabric before gluing it on the boards to ensure it was on straight and even.  It all turned out okay; I just realized that taking that extra step would have made my life a tad easier.

Smoothing out the fabric was an excellent job for my little helper!

I didn't take photos of the last step, but all I did was use Okay To Wash It fabric glue to glue the fabric to the edges and the back of the boards.  If you haven't tried this glue already, it's awesome!! It's what I use to "sew" my husband's scouting patches on his uniform.

The very, very last step was adhering the fabric trim to the front of the boards.  Yes, I do kind of wish I had just sewn those on, but again, it really turned out fine just using the fabric glue.  The strips are 1" wide by 17" long.

And there you go!  A super cute memo "board" with two magnetic sections and two cork board sections waiting for photos of 2 very cute little boys to be hung on them.


Wednesday, July 18, 2012

Our Wedding DIY Projects & Details

Probably the biggest reason for me being gone so much in the last month was my little brother's wedding. They were married in Utah but had receptions in Utah, Texas and here in Phoenix, since that's where Nathan grew up. Since my sister and I both live here, we were put in charge of the entire shin-dig. Here's a quick look at what we did:

Hanging mason jars.  I hot glued hemp around the mouth of the jar, knotting a piece long enough for hanging.  We glued a strip of burlap and a piece of ribbon around the jar and voila!  The original idea was to put a red sunflower in the jar, but it turned out that the flower buds were too big to fit.  I think they were just as cute empty, though!

Photo Canvas Sign In "Book".  I blew up one of Nathan & Megan's engagement photos and Mod Podged it to a 16x20 canvas.  We left a few Sharpies out and let people sign the photo.  This is the only photo of it, so you can't really see how it turned out, but you get the idea.  I think it turned out really cute and will be a fun memento to have hanging in their new apartment.  **Oh! And that old, teal birdcage to the left? My sister and I found it at an antique store for like $15.00 and fell in love with it immediately.  It was the perfect thing to hold all the cards!
Candy Bar & Sweets Table.  This one is pretty self explanatory.  Red and teal were our colors of choice, so we bought all the appropriate candy we could find!  We also served lemon cakes, cinnamon bites, cupcakes and strawberry shortcake kabobs (you can find my tutorial for those {here} ).


**Thanks to {Jacie Ames Photography} for several of the photos**

And this is my husband and I towards the end of the evening.  Can you tell I'm roasting and exhausted?  I've decided that pregnant women shouldn't be in charge of any major productions. :)

Sunday, July 8, 2012

Neck Coolers: A Tutorial

I am back!  For real this time...and hopefully for good until it's time for maternity "leave".  The past month has been a whirlwind of traveling, family and fun; but I am happy to be home and getting resettled into normal life!

So.  One of the many things I was busy with last month was Girl's Camp (for those of you who are not LDS, Girl's Camp is exactly what it sounds like; a camp for teenage girls ages 12-18).  Because we are in Arizona and it is H.O.T., I decided to make neck coolers to help keep our girls cool amidst the super high temps.

Here's how it went:

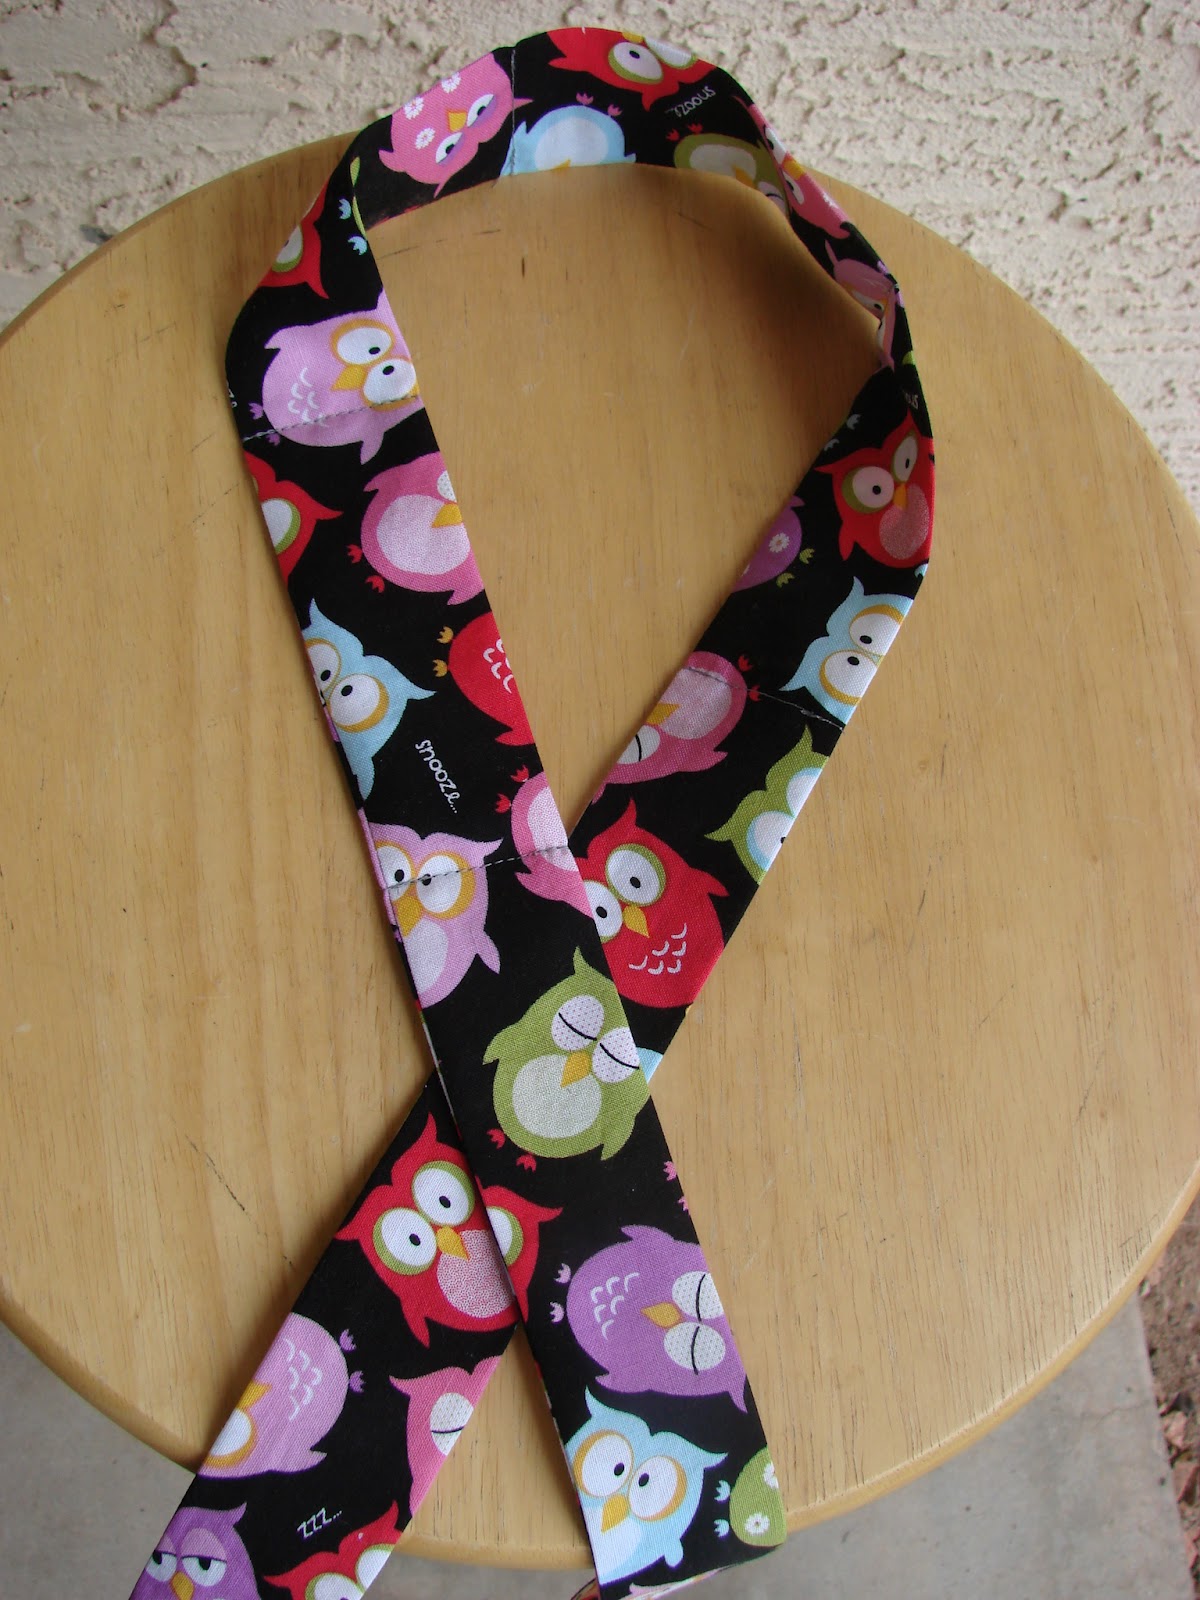
Pick any cotton fabric you want.  Because our theme this year was "Whoo's on the Lord's Side, Whoo?", I went with this super cute owl fabric that I ordered from {Stitchin Away}.  You will also need thread and polymer water crystals* (I will get to those later, but you can get them at any craft store or gardening store).

To start, you want to cut your fabric into a 4"x 36" strip.   You can make them longer than 36", but because I was making 32 of these bad boys, I needed to get as many out of a yard as I possibly could.  And actually, 36" worked perfectly for our teenagers!!


Fold your strip in half lengthwise (with right sides together) and iron it flat.  Sew the entire length of your long side using a 1/2" seam allowance, leaving you with a long, 36" tube of fabric that is open on both ends.

If you are only making a few and want your seam to be cleaner and lay better, trim the excess fabric off the seam allowance.  Again, since I was making 32, time was of the essence, and I skipped that step.  They turned out fine!


You will then turn your tube right side out and iron flat again, with your seam on one of the edges.
Here's where it gets kind of tricky, just because my fabric is dark and you can't see where I sewed.  Fold your tube in half to ind the center and sew a straight line across (so you basically have two large sections of your tube).
Open one end of your tube, and poor 1/4 to 1/2 a teaspoon of the polymer water crystals in.  *Be sure to finish one neck cooler completely and submerge in water to make sure you are putting the proper amount of crystals in.  In the first cooler I made, I only put 1/4 of a teaspoon in each pocket, but realized I could easily fit more, so I ended up using a heaping 1/2 t. for each pocket.*

Measure 4" up from your center seam, and sew another seam straight down, making a little 4" pocket to secure your crystals.  Does that make sense?  You will repeat this one more time on the same side that you started, and then repeat the process on the other end of your tube.  You should end up with 4, 4" pockets (each holding polymer crystals) in the center of your tube.

To finish them off, simply fold in the edges on your ends, and stitch straight across, securing them closed.

That's it!  They are super easy to make.  Just submerge them in cool water until they expand and enjoy!  They will stay cool and expanded for quite awhile before returning to their original state, and they can be used over and over again.

*These are polymer water crystals. 
It's the same stuff used in baby diapers, but it is also used for gardening.  You can buy them at any craft store and I'm assuming any gardening store.  I actually ordered mine from Amazon, and purchased a 1lb bag of it for less than $10.  I had a bit left over after making all 32 neck coolers.

Thursday, May 10, 2012

Artwork/Photo Gallery

My friend Rachel over at {Family Ever After} is co-hosting a monthly "Pinspired Rewired" competition.

This month, the theme is Washi Tape.  Have you seen washi tape yet?  SO much fun!  Basically it's masking tape, only with fun, colorful designs on it.  Lots of fun.  Anyway.  I have this project that (embarrassingly enough) I have been "working" on since January.  Originally, I wanted it to be a photo gallery in my boy's room with large photos of them hanging from it with cute clothes pins that I was decorating with paper and Mod Podge.  Okay.  Well those clothes pins were taking way too long for me.

And then I found this on Pinterest:

Super cute clothes pins covered in washi tape, originally from {The Little Pink Studio}.  SO much easier than scrapbook paper and mod podge!!

So, I ordered some super cute washi tape from {Pretty Tape} on Etsy, and pulled out some of my super cheap clothes pins purchased at Wal-Mart.


All it took was one strip of tape over the top of the clothes pin.  Took me 30 seconds to do all 4.

And now, we have a fantastic art display in my children's room.  Remember how I said I wanted it to showcase photos of my boys?  Well, Brychan has too many "treasured" pieces of art from preschool that he can't bear to part with yet.  So, until school is over, we are using it for art.  Once summer hits, photos of different sizes will be hung up there instead.


And the wire everything is hanging from?  It's a flexible shower rod from IKEA, which cost $14.99, and took my husband all of 5 minutes to hang.  It's perfect, and I love it!


Be sure to check out the Pinspired and Rewired contest!  I'm sure you'll get lots of fun ideas or decide to jump in and participate yourself!  It was the perfect motivation for me to finish this project that was taking ridiculously too long! :)


Wednesday, February 15, 2012

Favorite Fabric Shops

People ask me all the time where I buy my fabric.  I rarely buy anything but solid colors and flannel at Joann's or Hobby Lobby.  I try really hard to support other Etsy shops, and then I've stumbled across a few other online stores as well.  Since everybody always asks, I thought I'd compile a list share my favorites with you!


1. {Fabric.com}
    Obviously, this isn't a new site to many of you.  Their prices aren't always the cheapest, but with their free shipping with any purchase over $35.00, I can buy a ton at once and it ends up being cheaper.  And their design boards make it easier to match patterns/colors/etc.

2. {Raspberry Creek Fabric}
  Raspberry Creek is one of my top picks.  They have such a huge selection with many cute bundles.  And, they are an Etsy shop with a large flannel selection.  I love my flannel!  They also have an Etsy seller discount which I really appreciate.

3. {Fabric Shoppe}
 I know.  Another fairly well known.  But I still can't help but love it!  I've managed to get some killer deals through The Fabric Shoppe by watching Twitter at *just the right time*.  Excellent customer service, super fast shipping...couldn't ask for more!

4. {Stitch Stash Diva}
 This is one of my new favorite finds!!  I just recently found Tayva's shop on Etsy, and I adore buying from her.  She is so excited about her shop and you really feel like each fabric you purchase from her is one of her personal favorites.  She is super cute and makes it really fun buying there!

5. {Three Dolls Fabric}
 I honestly don't know what I would do without Three Dolls Fabric.  I buy 99% of my Amy Butler fabric there (more specifically, Amy Butler's Wallflower and Full Moon dots - which I use to make our most popular {car seat cover ever}).  I don't know what I'll do when they run out of it!  They are always quick to do my custom orders and seem to get it out to me even faster. Love, love, love them!!

These last two shops I have just found in the last week, but have already placed orders through them.

 {Fashionable Fabrics} and {Hawthorne Threads}.

Fashionable Fabrics has a large selection and is really easy to shop.  They've categorized all their fabrics in several different ways (collection, manufacturer, designer, print) so it's easy to find exactly what you're looking for.  If I'm in the mood to make little boy things, I can look at all their fabrics especially geared for little boys.  Makes my life easier!

Hawthorne Threads is my newest find and I just placed my first order this week, actually.  However, I was able to find a specific fabric that everybody else was completely sold out of.  That makes me very excited!

So...the next time you find yourself needing fabrics, be sure to check out one of these shops!  If you're like me, you're bound to find something you love!!

<a href="http://naptimecrafters.blogspot.com/"><img src="https://blogger.googleusercontent.com/img/b/R29vZ2xl/AVvXsEiheq7XP7760MqX0F1E8bSx-Fan0QG3_-YscoDzPkzGYs2wP5cz0YeXaLHL7ZCnsRPuXMSvSFrcSAgbdxYeztn9GRsFZ7txAEF9mNZFGzO2X3ZSxwFSDdFRK6CPSQ3OnlKzzFMdX27EBuTo/s1600/I%2527m+a+Friday+Fav.jpg"/></a>

Thursday, February 2, 2012

Valentine's Day Crayon Art

I've been itching to get a little project on here lately, so after I came up with this idea earlier in the week, I had to hurry and get it on here!

This is a combination of a couple of different craft projects I've seen floating around on Pinterest.  I had seen somebody do this project using thumbprints (SO cute!), but I have also really been wanting to give crayon art a try.  So, this is what I came up with!
A crayon dripped heart on canvas.  It was super easy, super cheap and super quick.  Perfect!!

I started with:

  • a 5x5 canvas (which was on sale for $2.49)
  • a few old crayons (I used exactly 4. Purple, pink and 2 shades of red) 
  • a bit of masking tape
  • a lighter 
  • my template (just google "heart template" you'll find something you love...)


Simply center your template to your canvas and then tape it down (I just used one tiny piece at the top of the heart). Then just start melting your crayons to drip on the canvas.


FYI? The cheap crayons drip the best!!  When you're done filling in your template (it took me maybe 20 minutes with plenty of interruptions from my 2 year old) simply peel it off. If you have any drips that fell inside the paper and outside of your heart, they easily peel off once they're dry.
There you have it!  I now want to get 2 more canvases to add an "I" and "U" to either side of the heart.

Wednesday, January 25, 2012

Project Flashback #3

This project is a super old one.
Before we moved to Arizona (almost 3 years ago), we had an adorable little house in Utah that was built in the 1940s. It didn't start out cute at all...we (and when I say "we" keep in mind that I really mean my hubby. He did 95% of the work) totally gutted the house and started over from scratch. Old walls down, new walls up. Old closets moved, new closets put in where they didn't exist before. I'll have to share those projects later.

When we were done, we had a beautiful little house that was 100% ours.
Cute, isn't she?
(By the way, all that luscious green grass is desperately missed!!) 

But. One of my favorite features of our house? Our hardwood floors. Granted, they took 30+ hours of sanding, almost a week of staining and topcoating, several splinters and 13 days to redo, but it was worth it!

In our master bedroom and the hallway, we decided to go with stripes. I was a little skeptical when my husband first suggested it, but in the end, I loved it!

So here are a couple of photos of the finished product. The rest of the house had the solid lighter color of wood. The dark stripes were hand painted by yours truly.


I realize stripes are not for everybody, but what do you think?

Wednesday, January 18, 2012

Project Flashback #2

Our main bath was an eyesore for a long time. I had been s-l-o-w-l-y been trying to redo it; when you're on a super tight budget, it makes it a little bit harder. But, last summer, with some help from my sister, we managed to make some improvements.

Here's what we started out with.  The lovely mirror took up that entire wall.  My husband hated it.  And, stepping out of that shower was a bit of a shocker too.

Ugly blinds (which unfortunately are still there...)

And just all around drab.  Blah.
I wanted this bathroom to be fun, since it's the bathroom my boys use.  When I started redoing it, we were starting to think about potty training, so I wanted the bathroom to be fun and inviting.  It's a tiny room so there's not much to work with.

And now, this pirate themed bathroom is what we have! We still need to redo the flooring, eventually change the vanity and update the shower, but I like this MUCH better. And the best part? I only spent $150 for the whole thing. Paint, mirror, pictures, decor and Pottery Barn linens. Yay me!!

I think my favorite part is these two little hooks we put in behind the door so the boys can reach their own towels.  And they love that they can get them and put them away all by themselves!

Wednesday, January 11, 2012

Project Flashback #1

I figured that since I am so super busy with all my current, time-consuming-projects-that-make-me-too-busy-to-do-quick-and-easy-to-share-projects, I would share a few of my past projects with you.  These are all pretty old, and I originally posted them on my family's personal blog.

This first one is from last summer.

One of the homes that my husband had listed for sale (he's a Realtor) had this dresser with a matching nightstand in it that had been abandoned. I had been looking for a big dresser for my boys to use and was so excited when I found out I could have the set.

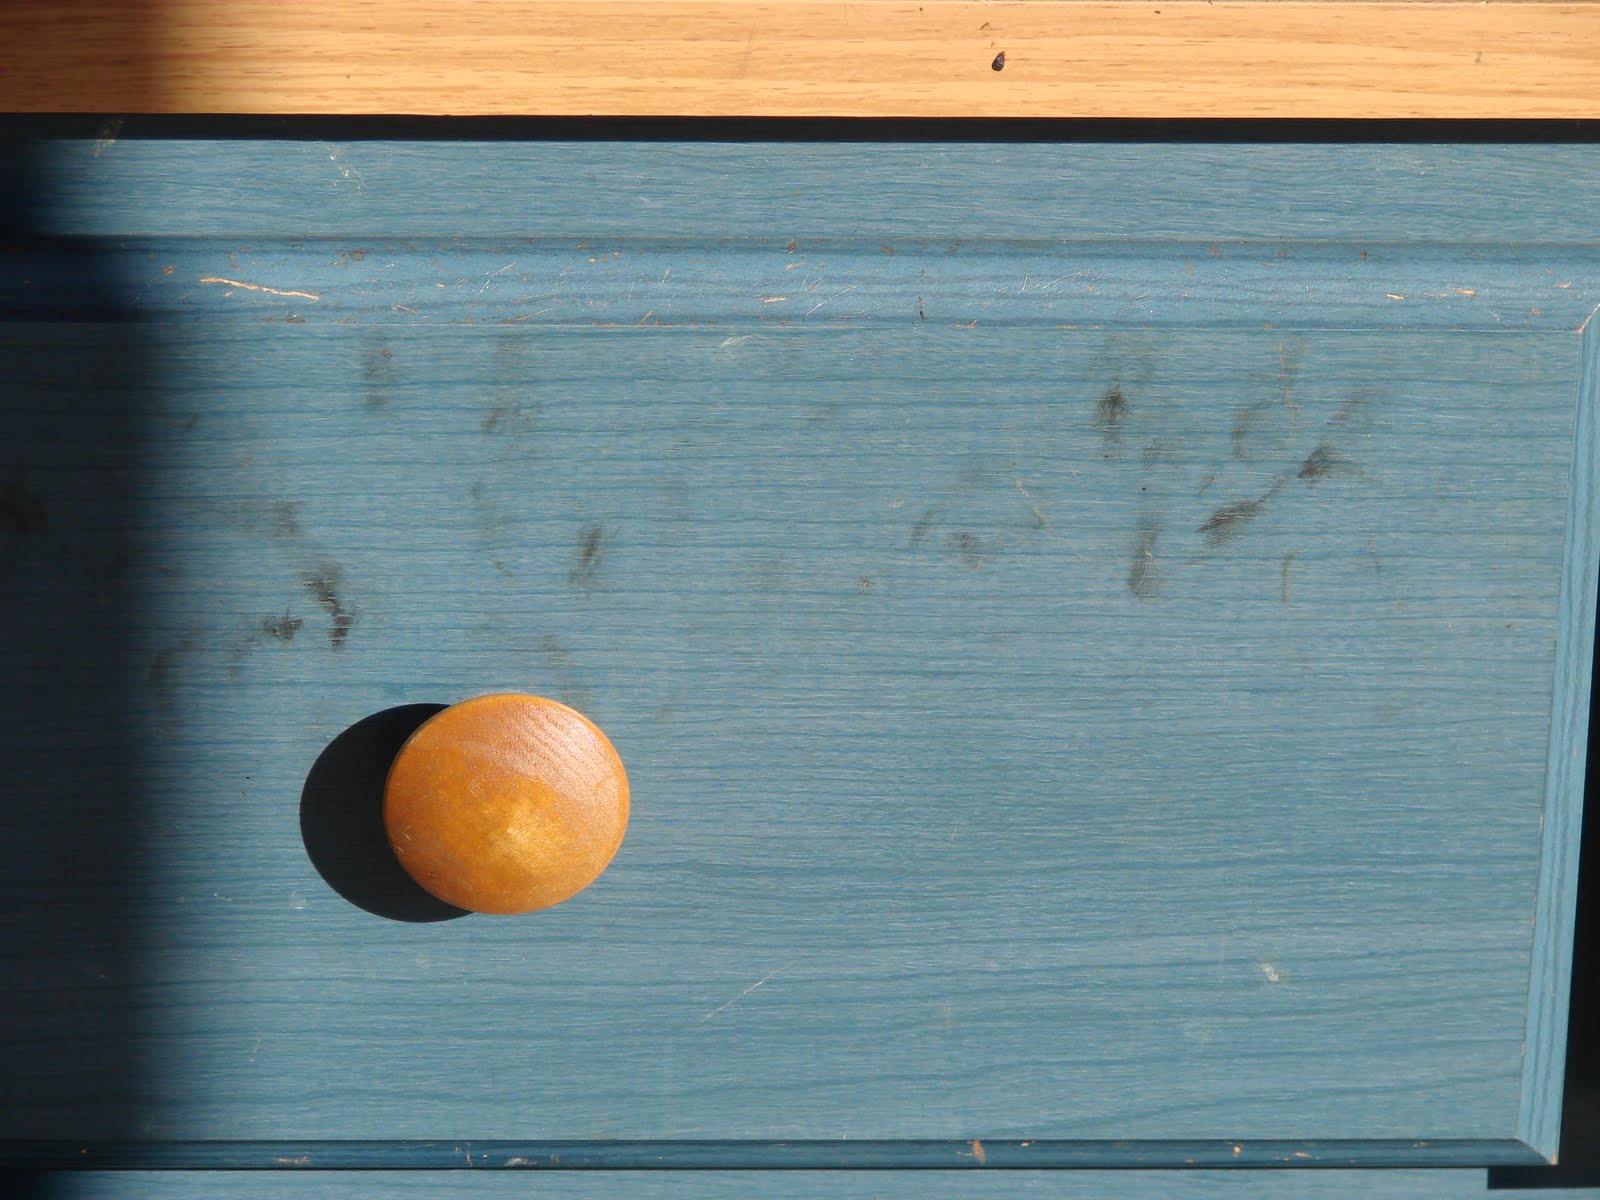
This is what it started out looking like. It was nasty, nasty, nasty.

I'm assuming that a teenage boy had it (judging not only by the look of the dresser/nightstand combo, but also by the looks of the room they came from).  And I have to admit that I was a little afraid of finding nasties (any kind of nasties...let your imagination run wild!) in this dresser somewhere.  Much to my relief, I found nothing inside but a bunch of dust bunnies.


After a coat of primer, two coats of paint, new pull handles and less than $50.00, this is what it looks like now. It's still not perfect, but it's at least clean and usable. And nice enough that I was okay putting it in our bedroom since the boys have no room whatsoever in theirs.

This was my first solo attempt at a big refurbishing project.  Did I do okay for a newbie?  I did learn a few things along the way, that's for sure!

LinkWithin

Related Posts Plugin for WordPress, Blogger...