home aboutus etsyshop contact Image Map
Showing posts with label tutorial. Show all posts

Wednesday, July 3, 2013

Rice Heating Pad

I'm sure all of you are already familiar with a rice heating pad.  In the small chance that you're not: they are wonderful.  Just a bag filled with rice that you stick in the microwave for a few seconds  and then just plop it on whatever part of your body that's needing some pressure and warmth.  I LOVE them and have always wanted one, but never took the time to make one.

Without going into too much detail...this weekend I had a horrible gallbladder attack. If you've never experienced one; I hope you never do. It's not something I would wish on my worst enemy. This particular attack lasted 3 days. For those of you who do know what I'm talking about; THREE DAYS!!! I was in agony and all I wanted was a rice heating pad to help alleviate the pain. But did I have one? Of course not! So, now that I am back among the living, I hurried and made one this afternoon.

Good news.  This is a great project for using up your scraps.  Even better news?  Seriously took me 15 minutes to do.  Tops.

Okay.  So all you need to do is figure out what size you want.  It can be as big or small as you want.  I had a roommate in college that had a long skinny one (kinda like a long, fat snake).  I knew I wanted mine to be just the right size to lay on my upper tummy area should I have another gallbladder attack before I get this sucker taken out of me.  My perfect size was about 9"x5".

Cut two pieces of fabric that are (obviously) the same size.

With same sides together, sew all around the outside edges, leaving a hole just large enough to a) turn your bag back right side out and b) pour all of your rice in.  If you feel so inclined, go ahead and trim the extra fabric before flipping it back right side out.
Then, pour in your rice!  It just so happens that a 2 lb bag (minus the cup I used with dinner tonight) was the perfect amount for my heating pad.  Be careful that you don't overfill it; you want there to be some "wiggle room" in there for the rice.
When you're done, shove all the rice to one end and quickly and carefully sew up your little hole.  You can do it by hand if you want it to be prettier.  I didn't really care and just wanted it done, so I used my machine.  If you look really close at the photo below, you can see it.
Then, viola!  You have a great little heating pad ready and waiting for you to need it.  I made mine with flannel; I wanted that extra cozy factor added to it.  As you can see it's already a big hit!


Thursday, May 23, 2013

Car Seat Organizers

We have a last minute, unplanned and unexpected trip to Utah coming up soon.  And because my car has little to no extra storage space when it comes to traveling, I wanted to throw together some car seat organizers for my boys to keep some of their "treasures" in.

So...I perused Pinterest for a few minutes to get a few different ideas, gathered some scrap fabric I had laying around (I happened to use a bunch of Peak Hour fabrics from Riley Blake), took a few measurements and got busy!

These were SO simple that a tutorial really isn't even necessary.  You can totally figure out how to make these just by looking at the photos.  After measuring my car seats, I found that I needed my fabric to be cut 16" x 19" for the main bag.  Basically, you take your 2 pieces of fabric, sew them right sides together and then flip them right side out and add your handles.


I added a pocket on the front of the organizer just because I had plenty of fabric.  The strap was 3" x 18" (I wanted it to be pretty flush with the car seat).

Making both organizers took about an hour.  Super fast.  Super easy.  Super cheap.
And I'm hoping that they are similar enough that there will be no fighting over who gets which one.
I can't wait to stock their little organizers full of their surprises for the trip (I think I'll do another post just with ideas for road trips with littles...), and hopefully these organizers take some of the chaos out of the back seat!!


Sunday, July 8, 2012

Neck Coolers: A Tutorial

I am back!  For real this time...and hopefully for good until it's time for maternity "leave".  The past month has been a whirlwind of traveling, family and fun; but I am happy to be home and getting resettled into normal life!

So.  One of the many things I was busy with last month was Girl's Camp (for those of you who are not LDS, Girl's Camp is exactly what it sounds like; a camp for teenage girls ages 12-18).  Because we are in Arizona and it is H.O.T., I decided to make neck coolers to help keep our girls cool amidst the super high temps.

Here's how it went:

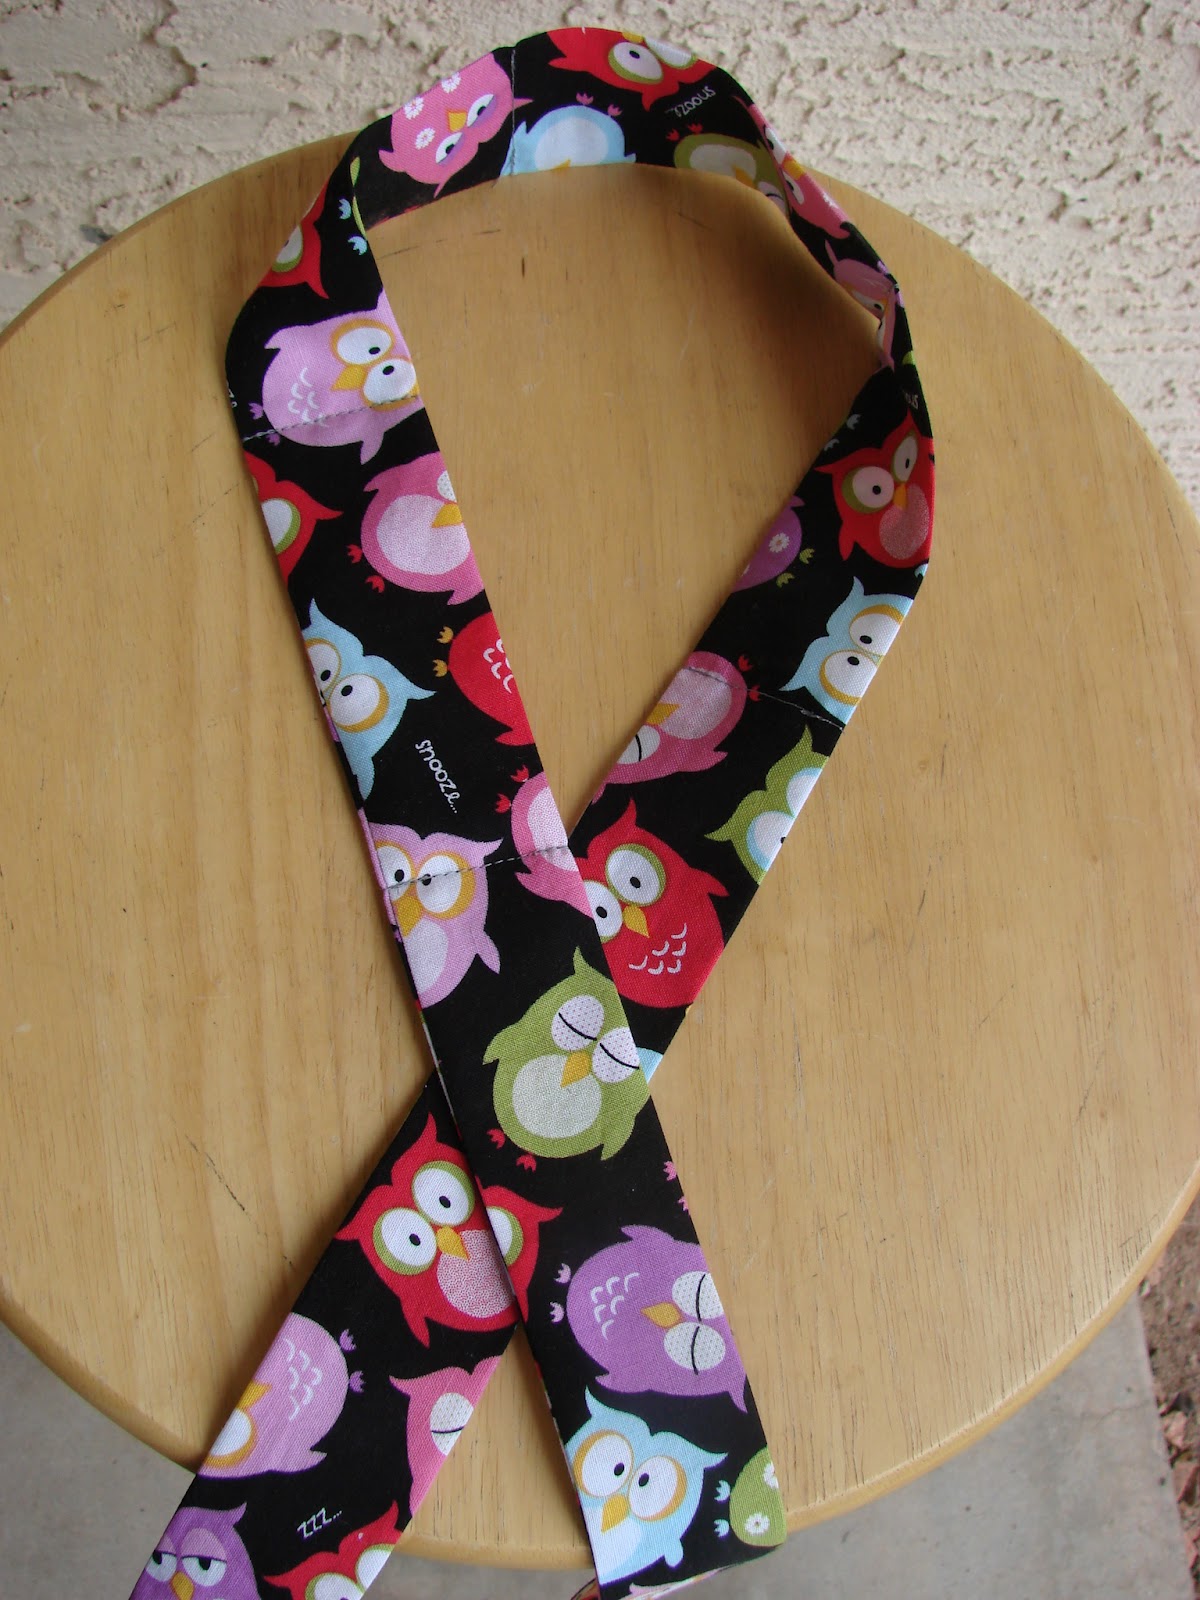
Pick any cotton fabric you want.  Because our theme this year was "Whoo's on the Lord's Side, Whoo?", I went with this super cute owl fabric that I ordered from {Stitchin Away}.  You will also need thread and polymer water crystals* (I will get to those later, but you can get them at any craft store or gardening store).

To start, you want to cut your fabric into a 4"x 36" strip.   You can make them longer than 36", but because I was making 32 of these bad boys, I needed to get as many out of a yard as I possibly could.  And actually, 36" worked perfectly for our teenagers!!


Fold your strip in half lengthwise (with right sides together) and iron it flat.  Sew the entire length of your long side using a 1/2" seam allowance, leaving you with a long, 36" tube of fabric that is open on both ends.

If you are only making a few and want your seam to be cleaner and lay better, trim the excess fabric off the seam allowance.  Again, since I was making 32, time was of the essence, and I skipped that step.  They turned out fine!


You will then turn your tube right side out and iron flat again, with your seam on one of the edges.
Here's where it gets kind of tricky, just because my fabric is dark and you can't see where I sewed.  Fold your tube in half to ind the center and sew a straight line across (so you basically have two large sections of your tube).
Open one end of your tube, and poor 1/4 to 1/2 a teaspoon of the polymer water crystals in.  *Be sure to finish one neck cooler completely and submerge in water to make sure you are putting the proper amount of crystals in.  In the first cooler I made, I only put 1/4 of a teaspoon in each pocket, but realized I could easily fit more, so I ended up using a heaping 1/2 t. for each pocket.*

Measure 4" up from your center seam, and sew another seam straight down, making a little 4" pocket to secure your crystals.  Does that make sense?  You will repeat this one more time on the same side that you started, and then repeat the process on the other end of your tube.  You should end up with 4, 4" pockets (each holding polymer crystals) in the center of your tube.

To finish them off, simply fold in the edges on your ends, and stitch straight across, securing them closed.

That's it!  They are super easy to make.  Just submerge them in cool water until they expand and enjoy!  They will stay cool and expanded for quite awhile before returning to their original state, and they can be used over and over again.

*These are polymer water crystals. 
It's the same stuff used in baby diapers, but it is also used for gardening.  You can buy them at any craft store and I'm assuming any gardening store.  I actually ordered mine from Amazon, and purchased a 1lb bag of it for less than $10.  I had a bit left over after making all 32 neck coolers.

LinkWithin

Related Posts Plugin for WordPress, Blogger...