home aboutus etsyshop contact Image Map
Showing posts with label summer. Show all posts

Wednesday, July 16, 2014

Oh, What do You do in the Summertime?

We were lucky enough to spend 75% of our first month of summer break traveling.  When we got home, my children were a tad high maintenance since they'd been over-stimulated with non-stop fun for a month.  I've been busy coming up with fun ideas to try to keep them busy while we're at home between days at the pool and other fun field trips.  Where do I go for ideas?  Pinterest, of course!

Just a few days ago, we made playdough.  I have posted my own recipe for glitter playdough HERE, and liquid playdough HERE. But this week we tried this no cream of tarter recipe found at To the Moon and Back.


The dough turned out perfect and is still in great condition several days later.  One batch is more than enough to split in two, though, so if you need multiple colors for multiple littles, one or two batches will suffice!


We also had fun with these robot prompts from Picklebums.  My oldest even ended up cutting his robot parts and pasting his new 'bots together.  The nice thing about this is that Picklebums was nice enough to offer it as a free printable, so we can go back for more anytime we want! ;)


Just before school let out for the year, some high schoolers came to my son's kindergarten class and did origami with them.  Since then, he's been obsessed.  So, we recently ordered this Origami Fun Kit for Beginners (Dover Fun Kits)from Amazon: (affiliate link)

It has been great for both my boys.  Obviously, I have to help them out a lot, but it is great for fine tuning their fine motor and critical thinking skills.  After they are done folding their origami, they color in the faces and any details they may want.  I currently have quite the zoo collection going on in my house.  Their imaginations have run wild...their cats have names and their pigeons now have nests...by far the best $8.00 I've spent all summer.

What about you?  How have you been keeping your little ones busy this summer?


Monday, July 1, 2013

Summer Lovin'

I know I've been MIA for awhile...we've been busy enjoying our summer before my two oldest start school in another month.  Here's a quick recap on what we've been up to:

Spent a week in Utah visiting family


Stopped at Hoover Dam

We've been spending LOTS of hours at the pool


And exploring different parks

I can't believe we only have a month before school starts again! 

What have you been busy doing this summer?

Sunday, July 8, 2012

Neck Coolers: A Tutorial

I am back!  For real this time...and hopefully for good until it's time for maternity "leave".  The past month has been a whirlwind of traveling, family and fun; but I am happy to be home and getting resettled into normal life!

So.  One of the many things I was busy with last month was Girl's Camp (for those of you who are not LDS, Girl's Camp is exactly what it sounds like; a camp for teenage girls ages 12-18).  Because we are in Arizona and it is H.O.T., I decided to make neck coolers to help keep our girls cool amidst the super high temps.

Here's how it went:

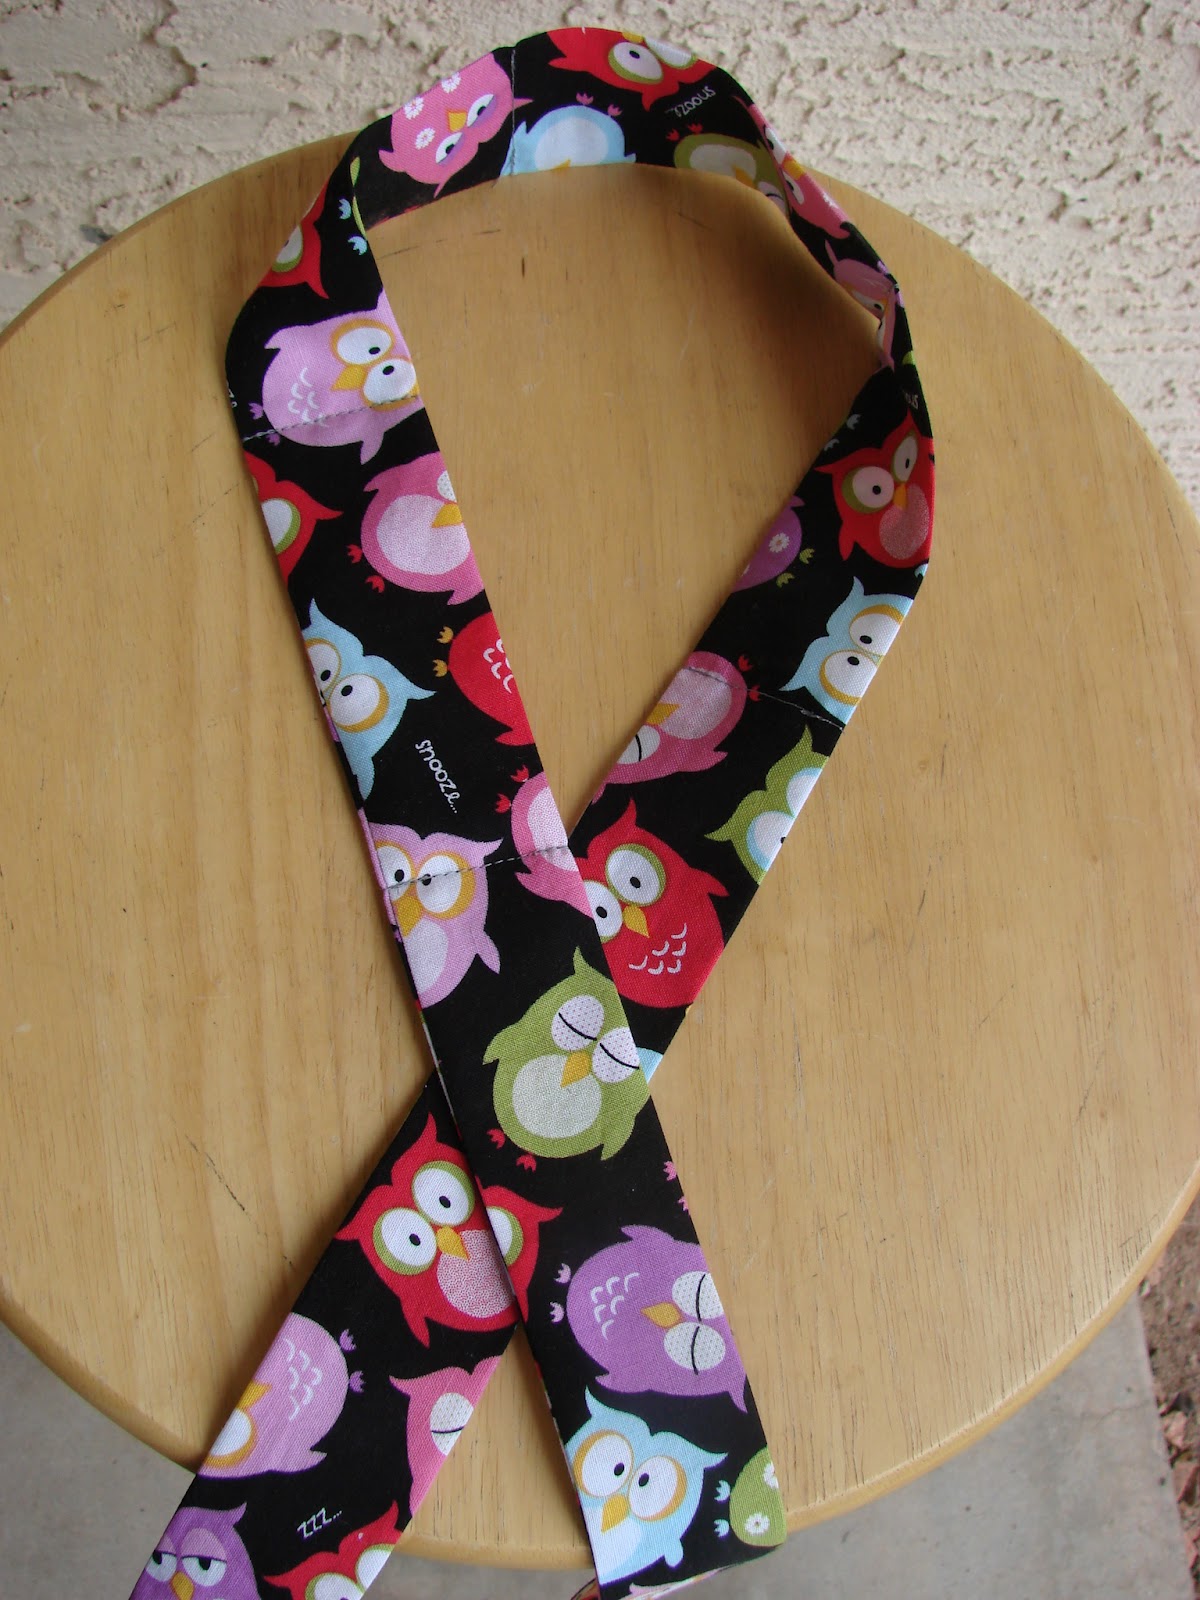
Pick any cotton fabric you want.  Because our theme this year was "Whoo's on the Lord's Side, Whoo?", I went with this super cute owl fabric that I ordered from {Stitchin Away}.  You will also need thread and polymer water crystals* (I will get to those later, but you can get them at any craft store or gardening store).

To start, you want to cut your fabric into a 4"x 36" strip.   You can make them longer than 36", but because I was making 32 of these bad boys, I needed to get as many out of a yard as I possibly could.  And actually, 36" worked perfectly for our teenagers!!


Fold your strip in half lengthwise (with right sides together) and iron it flat.  Sew the entire length of your long side using a 1/2" seam allowance, leaving you with a long, 36" tube of fabric that is open on both ends.

If you are only making a few and want your seam to be cleaner and lay better, trim the excess fabric off the seam allowance.  Again, since I was making 32, time was of the essence, and I skipped that step.  They turned out fine!


You will then turn your tube right side out and iron flat again, with your seam on one of the edges.
Here's where it gets kind of tricky, just because my fabric is dark and you can't see where I sewed.  Fold your tube in half to ind the center and sew a straight line across (so you basically have two large sections of your tube).
Open one end of your tube, and poor 1/4 to 1/2 a teaspoon of the polymer water crystals in.  *Be sure to finish one neck cooler completely and submerge in water to make sure you are putting the proper amount of crystals in.  In the first cooler I made, I only put 1/4 of a teaspoon in each pocket, but realized I could easily fit more, so I ended up using a heaping 1/2 t. for each pocket.*

Measure 4" up from your center seam, and sew another seam straight down, making a little 4" pocket to secure your crystals.  Does that make sense?  You will repeat this one more time on the same side that you started, and then repeat the process on the other end of your tube.  You should end up with 4, 4" pockets (each holding polymer crystals) in the center of your tube.

To finish them off, simply fold in the edges on your ends, and stitch straight across, securing them closed.

That's it!  They are super easy to make.  Just submerge them in cool water until they expand and enjoy!  They will stay cool and expanded for quite awhile before returning to their original state, and they can be used over and over again.

*These are polymer water crystals. 
It's the same stuff used in baby diapers, but it is also used for gardening.  You can buy them at any craft store and I'm assuming any gardening store.  I actually ordered mine from Amazon, and purchased a 1lb bag of it for less than $10.  I had a bit left over after making all 32 neck coolers.

Friday, June 1, 2012

Strawberry Shortcake Kabobs

My youngest brother is getting married in 3 weeks, so my sister and I have been planning and preparing for one of their receptions (out of 3!) that will take place here in Phoenix.  One of the desserts we plan on serving are Stawberry Shortcake Kabobs.  Quick, easy, light and tasty!

Depending on the size of the strawberries, I will cut them in half before I stick them on the skewer.  And I also typically cut my skewers in half; that tends to be plenty and makes them easier to handle.  For these particular kabobs, I used pound cake cut into squares, but you could use doughnut holes or angel food cake.

And then to top them off, I melted a few bars of chocolate almond bark (with a few teaspoons of oil mixed in) and drizzled it over the tops of the kabobs.  White chocolate would be just as tasty!

A perfect summer treat for any party or gathering!

LinkWithin

Related Posts Plugin for WordPress, Blogger...